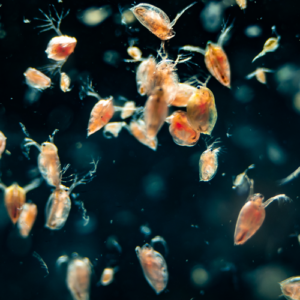
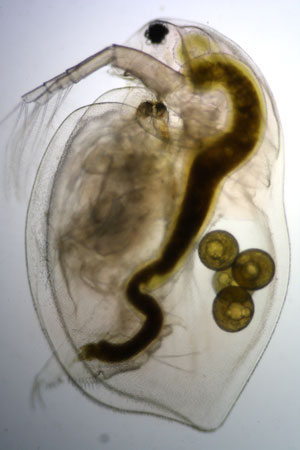
Water flea Daphnia pulex
Compound microscope activity sheet
Materials
- Glass microscope slides with pre-prepared chamber of electrical tape.
- Plastic cover slips
- Paper towels or tissues
- Pasteur pipette or dropper
- Daphnia pulex collected from a pond/stream or acquired commercially.
- Petri dish (optional)
Methods
- Suck up some of the water containing Daphnia with the dropper or pipette and place in a petri dish if available (if not, proceed to 3). This can by tricky for small children, but is fun trying.
- Look at the Daphnia with a stereomicroscope if available.
- Place the Daphnia (in a small drop of water) in the microscope slide with the pre-prepared tape chamber.
- Gently place a coverslip on top of the Daphnia without pressing. The Daphnia should live for a while like this, as long as there is the right amount of water on the slide. View with 4x or 10x objectives on a compound microscope and adjust focus carefully to see different features.
Tip:
- Many features of the Daphnia are spectacular, pay attention to the beating heart, eyes and surface of the animal (where individual cells are clearly visible).
Fun facts:
Female Daphnia do not always need a male to have offspring; they can have babies on their own!
Daphnia can survive harsh conditions such as a dry spell if their pond dries up for a while, and they can sometimes even survive freezing
Making a Chamber with Tape
This method can be used when imaging relatively thick samples (e.g. Daphnia or Volvox), which will probably be damaged when mounted directly between a coverslip and a slide.
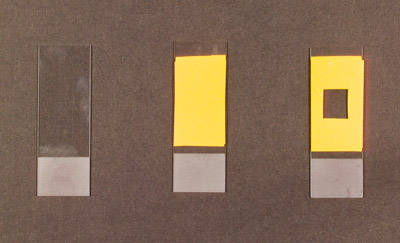
- Place one to three layers of electrician’s tape on a microscope slide (the number of layers depends on the thickness of the sample you are imaging).
- Using a Stanley knife, razor blade or scalpel, carefully score an approximately 1 cm by 1 cm square in the layers of tape.
- Peel away the central square of tape to make the chamber.
- Add the sample in a drop or two of liquid.
- Gently place a coverslip on the sample.
- Wick away any excess liquid by inserting tissue paper next to the cover slip.