How to use a compound microscope
A compound microscope is a microscope that uses multiple lenses to enlarge the image of a sample. Typically, a compound microscope is used for viewing samples at high magnification (40 – 1000x), which is achieved by the combined effect of two sets of lenses: the ocular lens (in the eyepiece) and the objective lenses (close to the sample).
Mounting samples on a microscope slide
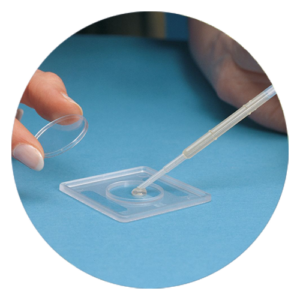
- Place a small amount of your sample in the centre of the microscope slide (depending on the sample, it can be smeared, sliced or placed as a drop).
- Place a small drop of water or stain over the sample.
- Gently place the cover slip over the sample. This is to protect the objective lenses if they touch the slide.
- Remove excess water or stain with a paper tissue by touching the side of the coverslip and allowing the paper to absorb the liquid (do not press the coverslip).
Operate a compound microscope
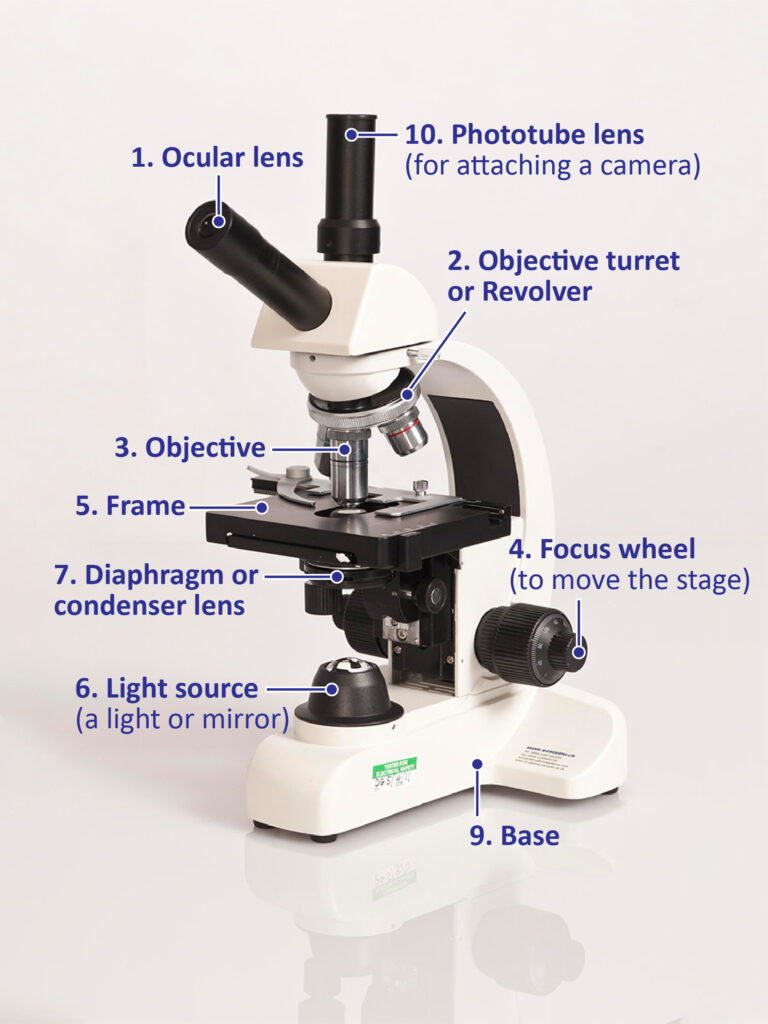
- Turn the revolving turret (2) so that the lowest power objective lens (eg. 4x) is clicked into position.
- Place the microscope slide on the stage (6) and fasten it with the stage clips.
- Look at the objective lens (3) and the stage from the side and turn the focus knob (4) so the stage moves upward. Move it up as far as it will go without letting the objective touch the coverslip.
- Look through the eyepiece (1) and move the focus knob until the image comes into focus.
- Adjust the condenser (7) and light intensity for the greatest amount of light.
- Move the microscope slide around until the sample is in the centre of the field of view (what you see).
- Use the focus knob (4) to place the sample into focus and readjust the condenser (7) and light intensity for the clearest image (with low power objectives you might need to reduce the light intensity or shut the condenser).
- When you have a clear image of your sample with the lowest power objective, you can change to the next objective lenses. You might need to readjust the sample into focus and/or readjust the condenser and light intensity. If you cannot focus on your specimen, repeat steps 3 through 5 with the higher power objective lens in place. Do not let the objective lens touch the slide!
- When finished, lower the stage, click the low power lens into position and remove the slide.
Tips:
- Do not touch the glass part of the lenses with your fingers. Use only special lens paper to clean the lenses.
- Always keep your microscope covered when not in use.
- Always carry a microscope with both hands. Grasp the arm with one hand and place the other hand under the base for support.